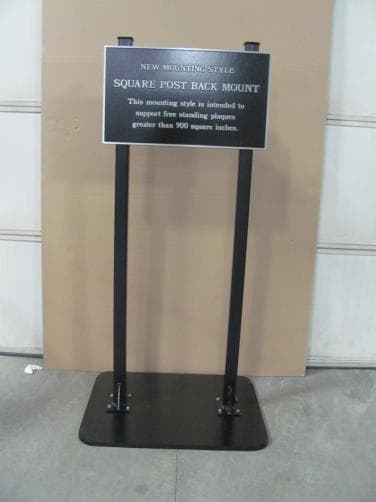
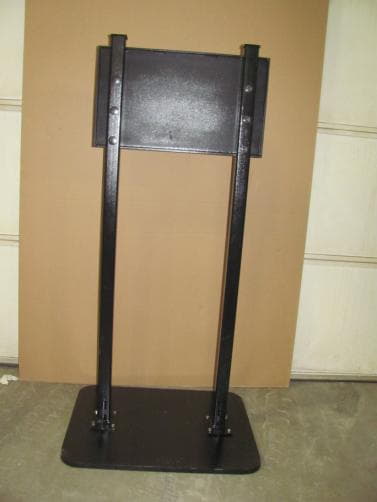
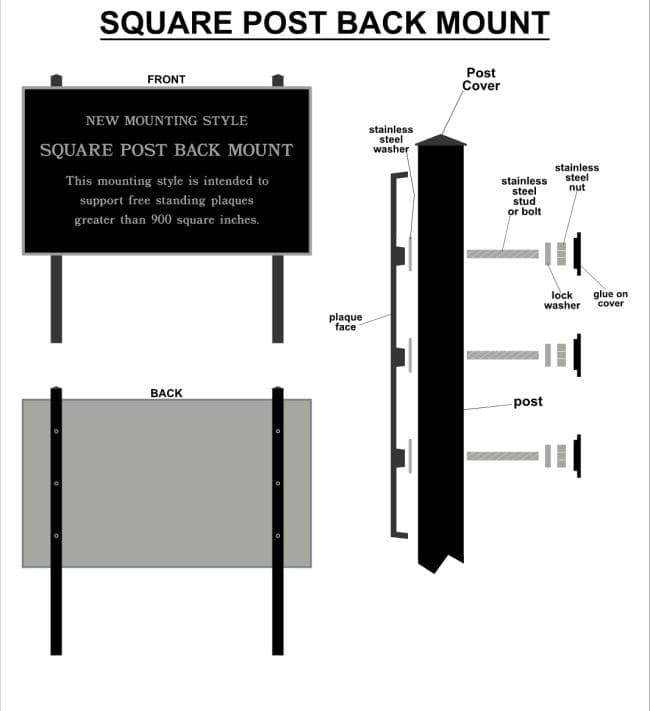
The Square post back mount is meant to provide a free standing plaque mount for plaques over 900 square inches. Using two or three steel posts that are 2"x2", 3"x3", or 4"x4", plaques up to 36 sq. ft. can be free standing mounted. The Square Post Back Mount is a complete mounting system that ships with the plaque and includes the posts and hardware necessary for install. Assembly only requires common hand tools and can be done at the job site.
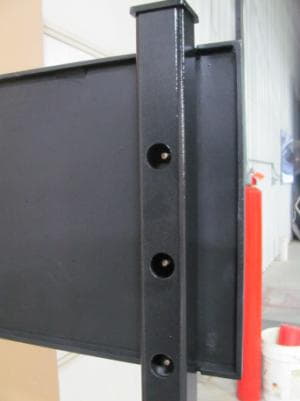
The Square Post Back Mount comes with posts, post rain caps, stainless steel washers, studs, and locking nuts and hole plugs. The posts will be 2"x2", 3"x3", or 4"x4" all with 3/16" wall thickness. The area of the plaque determines the post size used, the larger the plaque the bigger the post. The customer must tell us if the postes are pad mount on the surface or in-ground mount. Pad mounts will come with a rectangular braced pad with four mounting holes welded to the bottom of each post. In-ground mounts come with a longer post to allow a buried mount. We need to know buried depth for the posts to meet local codes and to be below the frostline. To size the posts we also need to know viewing height of the plaque. The last thing we need to know for post length is post rain cap height. Post rain caps can be 2" high, flush or 2" low from top of plaque. The standard is 2" high. Post length is then, rain cap height plus viewing height plus in ground length if choosing in ground mount. Rain caps or post covers are cast aluminum caps painted to match the posts that are glued in at the job site to keep rain our of the posts and provide a finished look.
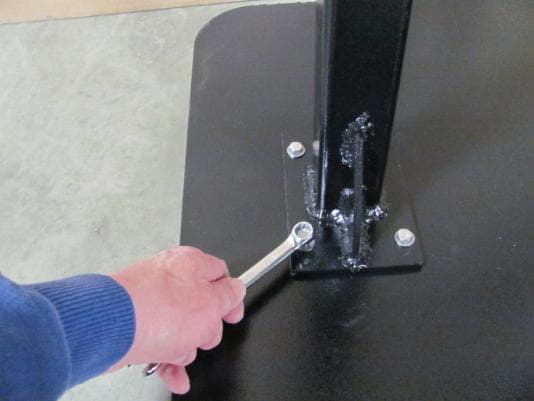
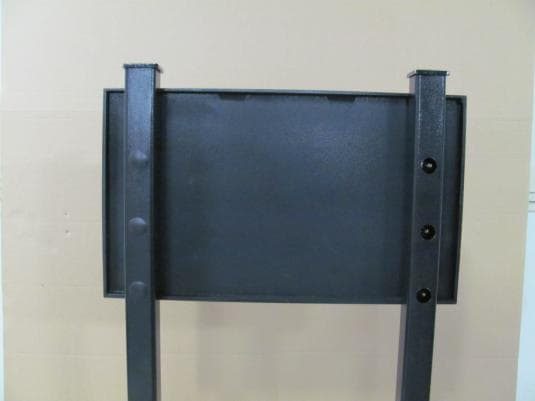
Assembly is done by laying plaque face down on a suitable surface to protect the face and assembling the legs to the back of the plaque. First install the ss studs into the threaded stud bosses. The best method to install the studs is to use two nus locked together to install the stud. Avoid using pliars or vice grips because that may damage the threads and make installing the nuts difficult. Next put a ss washer on each stud to provide corrosion isolation between the plaque and steel posts. Next put posts over the studs with small holes towards the plaque. Use a deep well socket to put a ss locking nut on each stud. A helpful hint is to use a small piece of tape to hold the nut in the socket when putting it on the stud. After all posts and studs are installed plumb and square the posts to the plaque and each other begore tightening the nuts. After the posts are mounted the plaque and posts can be stood up and installed. Always recheck plaque and posts for plumb true and level after installing. If everything looks good glue the rain caps and hole plugs into the level after installing. If everything looks good glue the rain caps and hole plugs into the posts.

Call now |

A Division of Advantage Signs & Graphics, Inc | Copyright © 2025 www.metalplaques.com | All Rights Reserved.

Brass, Bronze and Aluminum Custom Metal Plaques
Styles
Other Services