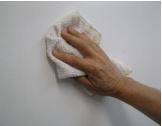
1. Clean Mounting Surface
Clean and prepare mounting surface before starting your install.
TIP: Surface should be flat, clean and free of dust or moisture
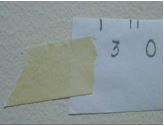
2. Position and Secure Guides
A Stencil Guide or Mounting Pattern are recommended to properly install flat letters. Layout, level and securely tape your guide flat to mounting surface. Check spelling, spacing and kerning of letters on guide.
3. Drill Holes
Choose a drill bit that coincides with the studs provided to you. Drill the holes in the proper locations indicated on the paper template.
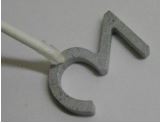
4. Apply Adhesive
After removing the pattern from the wall, apply adhesive to the studs or directly into the holes. We recommend 100% silicone or epoxy (use appropriate type if mounting interior or exterior).
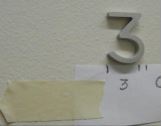
5. Tape Letters to Secure
Set letters into stud locations on the wall and let set so that the adhesive cures. If the letters are flush mounted, you can use tape to secure the letters during the curing process. Remove tape once the adhesive has set and enjoy the beautiful lettering you just installed!
6. Remove Masking Tape & Clean Letters
After adhesive sets (letters do not move), remove masking tape from letters. Clean off letter faces with a mild dish soap and water - wipe in same direction as letter grain to help prevent scratching letter faces.
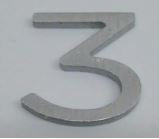
Getting a box full of metal letters, some studs, and a paper template can seem like a daunting task to put all together and make it look good on a wall. This quick guide to installing these letters will help you navigate your project to success!
Call now |

A Division of Advantage Signs & Graphics, Inc | Copyright © 2025 www.metalplaques.com | All Rights Reserved.

Brass, Bronze and Aluminum Custom Metal Plaques
Styles
Other Services